Are you building a detached house, a terraced house or even a large office building and looking for the most suitable cladding panel for your project? In this article, we'll use our experience from 20 years and thousands of projects to show you how to choose the right cladding panels for your project from hundreds of different types of cladding panels.
The roof and cladding panels protect the building, which is why investing in them is the smartest thing a builder can do. The importance of the roof has been well understood for a long time, but the importance of cladding panels has not, in our view, been recognised in the same way: awareness of their importance has grown, but not on the same scale as for the roof.
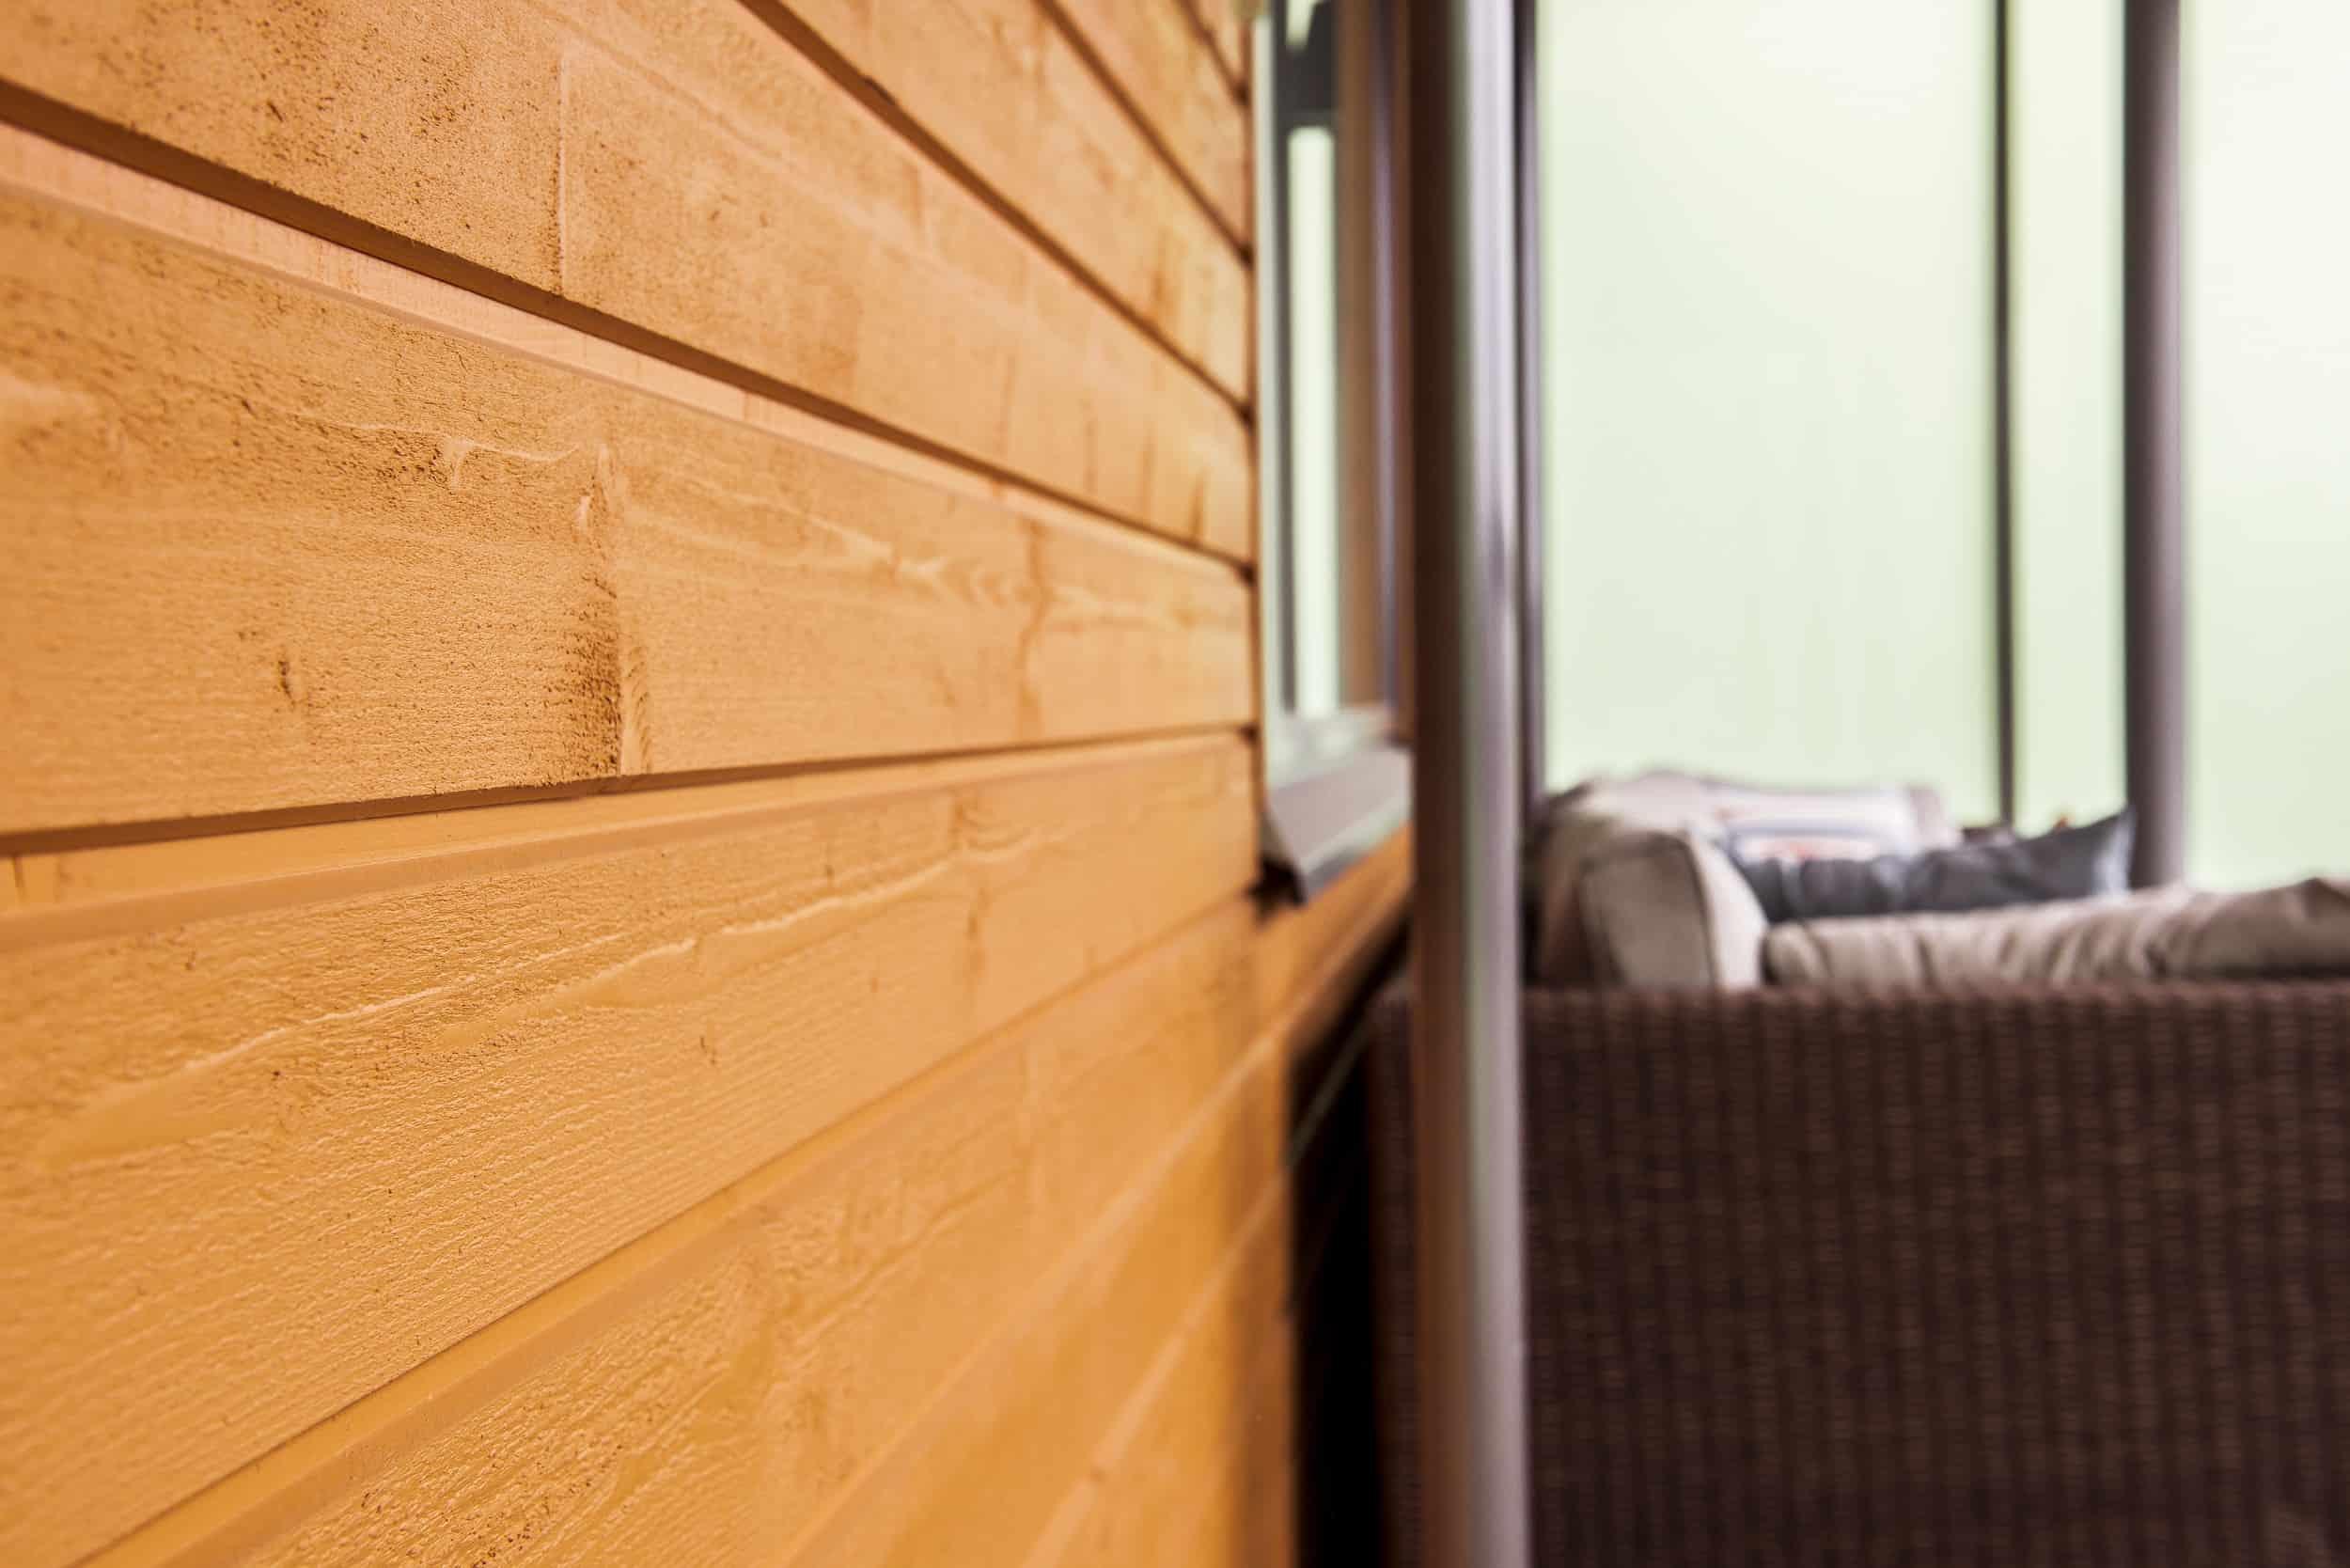
Different types of cladding panels - what are the differences?
Exterior cladding panels can be roughly divided into three different categories:
1. Undercoated exterior cladding panels
2. Exterior cladding panels
3. Pre-painted exterior cladding panels
Which of these options is best depends largely on the destination and the need. In particular, many people are surprised to find that the final price difference between the three panels is very small and sometimes none at all. Many people are confused by the price per metre quoted in the hardware store because, of course, the metre price does not include other costs that come with certain panels. The main difference is not the price but the amount of work that has to be done to install each panel. A primed exterior cladding panel requires the most work and a pre-painted panel by far the least. The price is still relatively the same, as you will soon see from the example.
The price per metre of a primed panel is the lowest of all, but as the panel has to be painted twice, the scaffolding rental is also paid twice. Of course, two coats of paint also take time.
A painted exterior cladding panel is slightly more expensive than a primed panel, and the price per metre also includes the cost of paints and long scaffolding hire for fixing and painting.
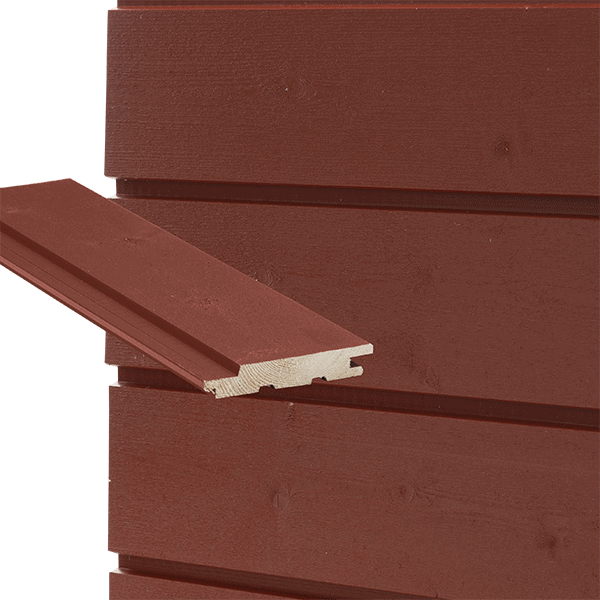
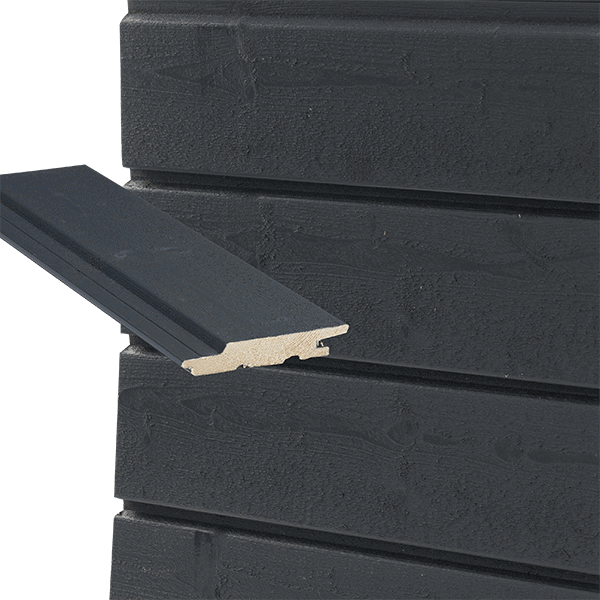
Pre-painted exterior siding panelshave the highest price per meter, but other costs are low compared to the previous two options. For example, paint is needed only for the cut edges, so a small can of paint is sufficient.
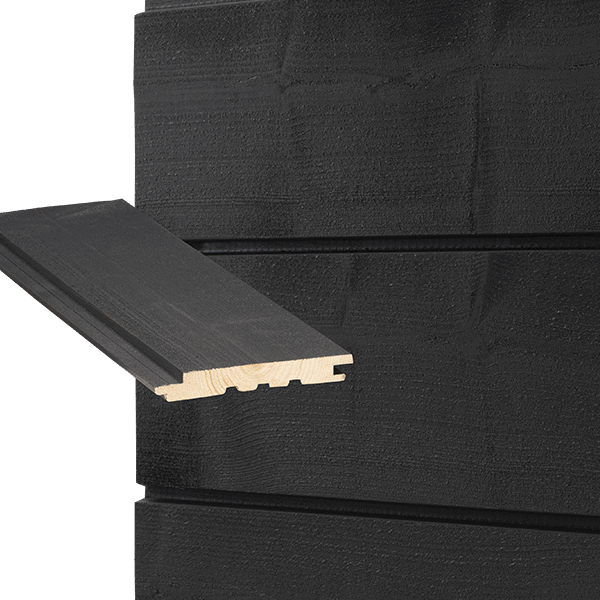
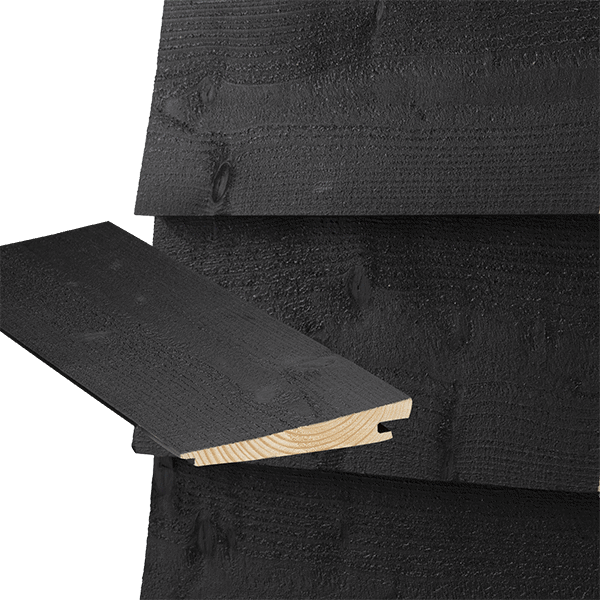
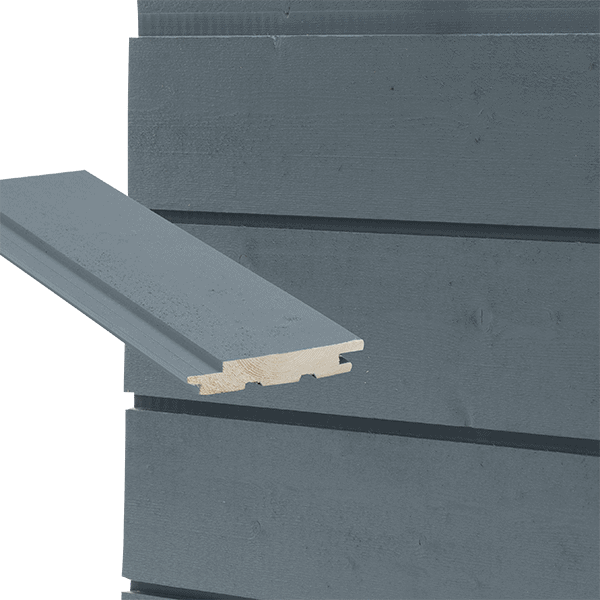
Pre-painted exterior cladding panels can also be installed with hidden fasteners. For example, Topcoat exterior cladding panels are fastened with clips so that the clip heads are hidden beneath the tongue of the next panel. This means the panels won’t need to be repainted for the next 10–20 years after installation. Therefore, we recommend pre-painted exterior cladding panels when you want a truly cost-effective exterior cladding solution for your project.
How to choose the right cladding panels for your project?
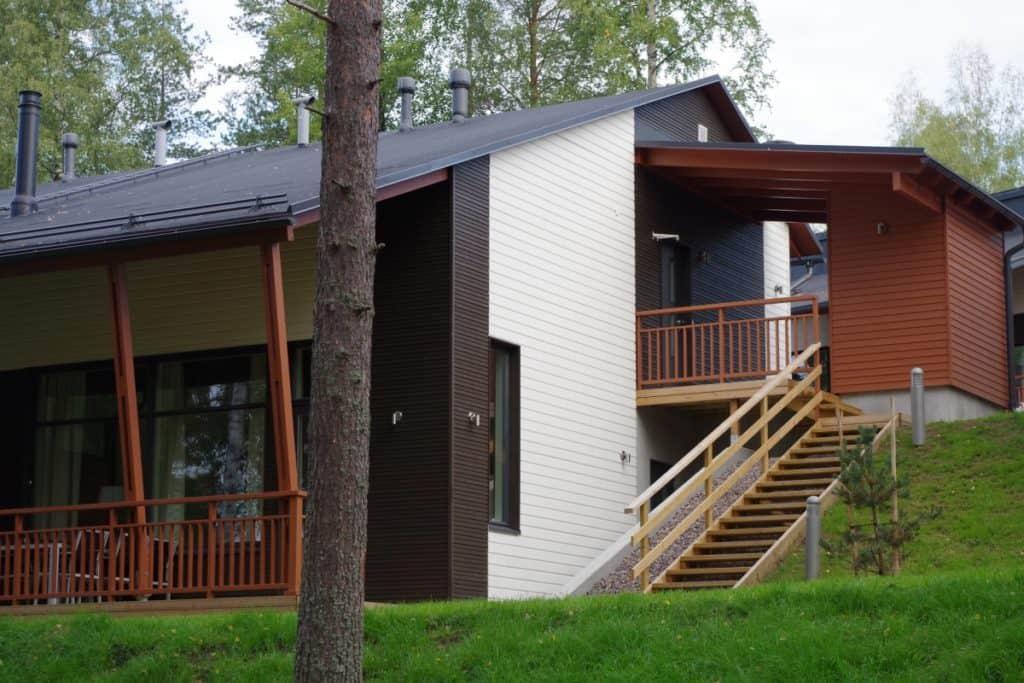
If you've never chosen exterior cladding panels before, it can seem like a chore to choose - there are many different types of panels just in terms of the degree of finish (base, intermediate and pre-painted), as well as different thicknesses, colours and profiles. Some panels are suitable for horizontal panelling, some for vertical panelling and some for both.
The following questions are a good place to start when choosing exterior cladding panels. Our experts will be happy to help you find the right panels and answer your questions.
1. Do you want horizontal or vertical panelling?
Not all exterior cladding panels are suitable for paneling in a particular orientation. Therefore, the orientation of the panelling should be decided first, as it limits the options to certain profiles.
Profiles suitable for horizontal mounting:
- W, V, K, U and L
- In fact, the only model that is not suitable for horizontal installation is the S. The S profile has a flat "roof" at the top of the panel, which would allow water to rest on top of the panel.
Profiles suitable for vertical panelling:
- V, U and S
- L, K and W are not suitable for vertical panelling
2. What kind of profile is right for you?
Let's take a look at some of the most popular profiles for exterior cladding panels. A different profile creates a very different atmosphere and can even outweigh colour in terms of how a house looks.
V-profile
V-profile panels are beautifully shaped, very understated and traditional exterior cladding panels. This profile is a safe choice for any application, as it is suitable for both horizontal and vertical cladding.
W profile
W-profile panels are a modernised version of the V-panel. The groove between the panels is noticeably narrower and has a more angular shade, giving the exterior cladding a modern, angular and linear look.
U-profile
U-profile panels are also very traditional exterior cladding panels that have retained their popularity for decades. Concealed fixing brings a modern elegance to this timeless classic.
K-profile
K-profile panels have a beautiful curved design that adds a softness to the appearance of the house. The curved shape leaves the groove between the panels slightly wider than usual, making the paneling look airy and smoothly flowing.
L-profile
The panels of the L-profile are placed on top of each other in a wavy pattern, leaving no gap between them. Because of its shape, this design has also been referred to as 'lime planking'.
S profile
S-profile panels are only suitable for vertical cladding due to their rectangular shape. The straight edge creates a thin and deep groove between the panels, which makes the cladding look sleek and carefully designed.
3. How wide and thick do you want the panelling to be?
Do you prefer wide or narrow panelling? For vertical panelling, most people prefer moderately narrow panelling, where the exterior cladding panels create a rim-like effect. In horizontal panelling, widths range from 120 mm to 275 mm. Exterior cladding panels wider than 200 mm are usually always made of glulam, as this makes the panel more durable, as glulam does not live in the same way as a wide panel wider than 200 mm made entirely of solid wood. The most common panel widths are 120 mm, 145 mm and 170 mm, but panels over 200 mm are becoming increasingly common.
The most common panel thicknesses are 23 mm and 28 mm. Given a choice, we would always go for the thicker panel because it is more durable. Of course, thicker panels are always a little more expensive, but it's worth saving a thousand euros on something other than cladding panels. When you protect your house once with a good quality cladding, it will last for years without maintenance.
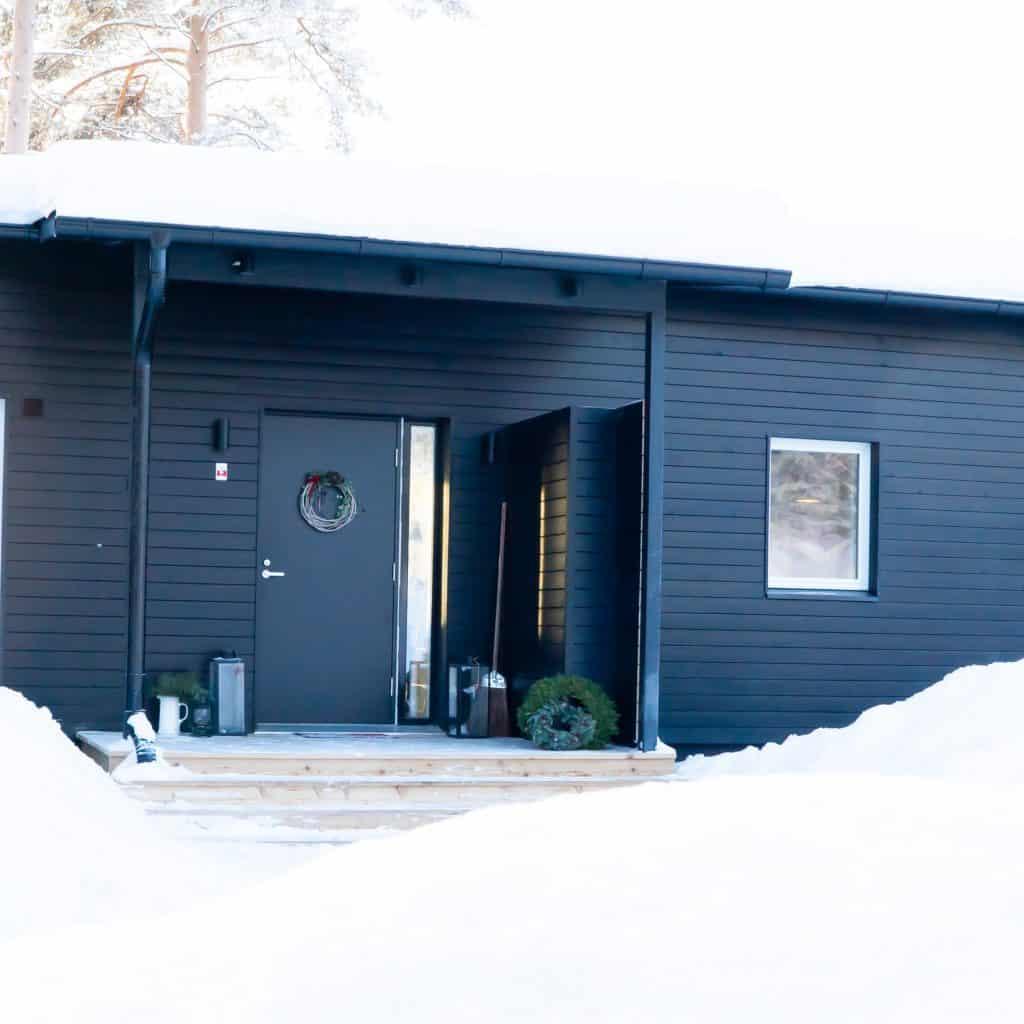
4. What colour panel do you want?
Once you've decided on the orientation, profile and technical dimensions of the panelling, the last step is to choose the colour that best suits the site. The desired colour is often known at the initial design stage, so our only tip for choosing a colour is about the tones you hear. When choosing an audible shade, make sure it is a durable audible shade. Audible shades fade more quickly, resulting in a maintenance painting interval of around 5 years, compared to 10-20 years for fully opaque shades.
Three common mistakes when choosing and installing exterior cladding panels
There are a number of factors to consider when buying exterior cladding panels, from budget to the appearance of the panel and the paint finish. Here are some typical "mistakes" that many people who choose exterior cladding panels can make.
1. The purchase decision is based on the metric price
The price per metre only tells you how much the panel costs in a hardware store. However, it does not tell you the total cost of the panel.
2. Painting panels in bad weather conditions
This applies only to exterior cladding panels that have been primed and undercoated, since pre-painted exterior cladding panels do not need to be painted on-site, except for cut edges. Painting conditions play a very significant role in how well the paint adheres to the panel.
3. The paint surface is broken with nails
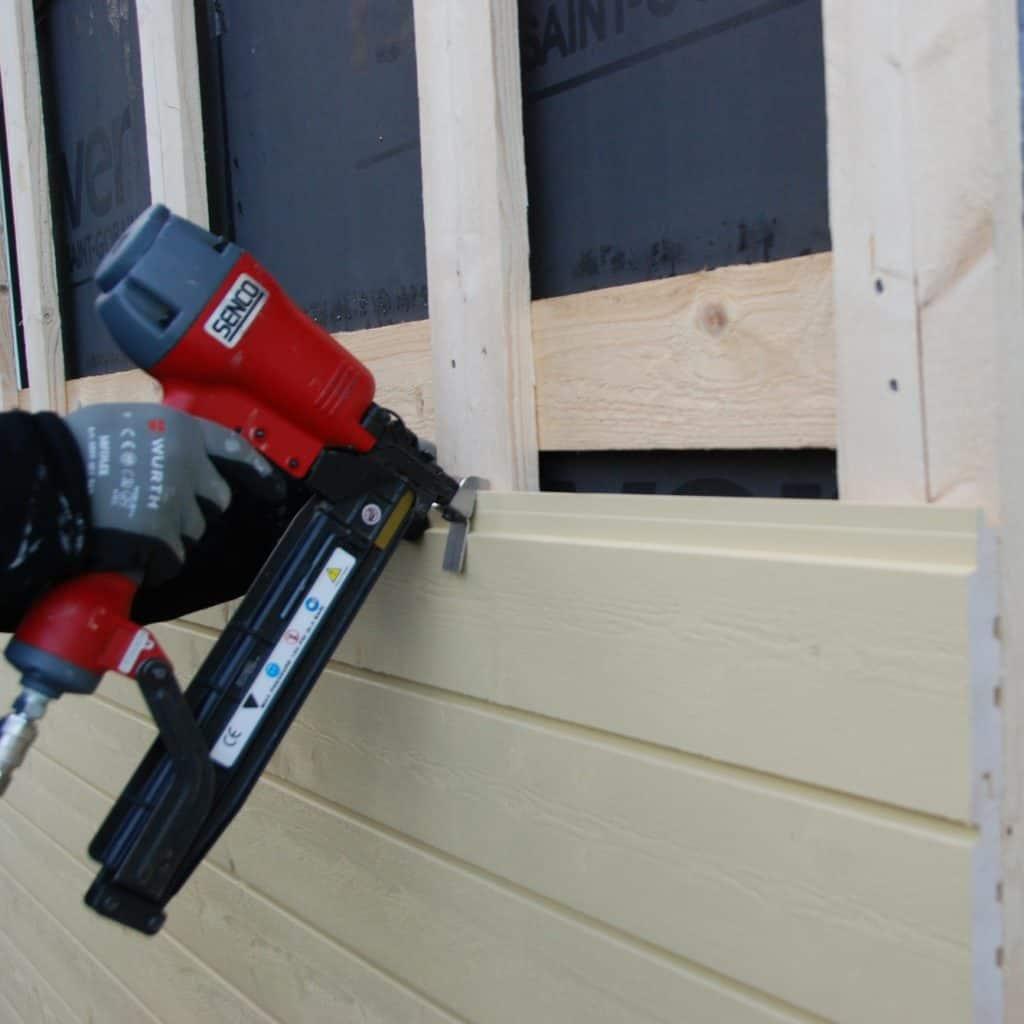
On average, 6 500-8 000 nails are used to fix the exterior cladding panels of a 200 square metre house. Each nail contributes to breaking the paint surface and making a visible hole in the wall. Even if the nail heads are painted, the paint on the heads will peel off more quickly due to the constant temperature fluctuations of the metal. Water condenses on the visible nail heads and seeps into the panel structure.
You can protect the painted surface by choosing exterior cladding panels with hidden fasteners. This way, the staples or nails are hidden under the tongue of the next panel, preventing water from entering the structure. A nail-free facade also looks more stylish.