Building a new façade or renovating an old one should be carefully planned. Tekniikan Rakennusmaail tests the pre-painted, concealed TOPCOAT® panel and Siparila's façade finishing products. Text by Ari Lahti, Photos by Merja Ratia
Always check the structural condition of the house
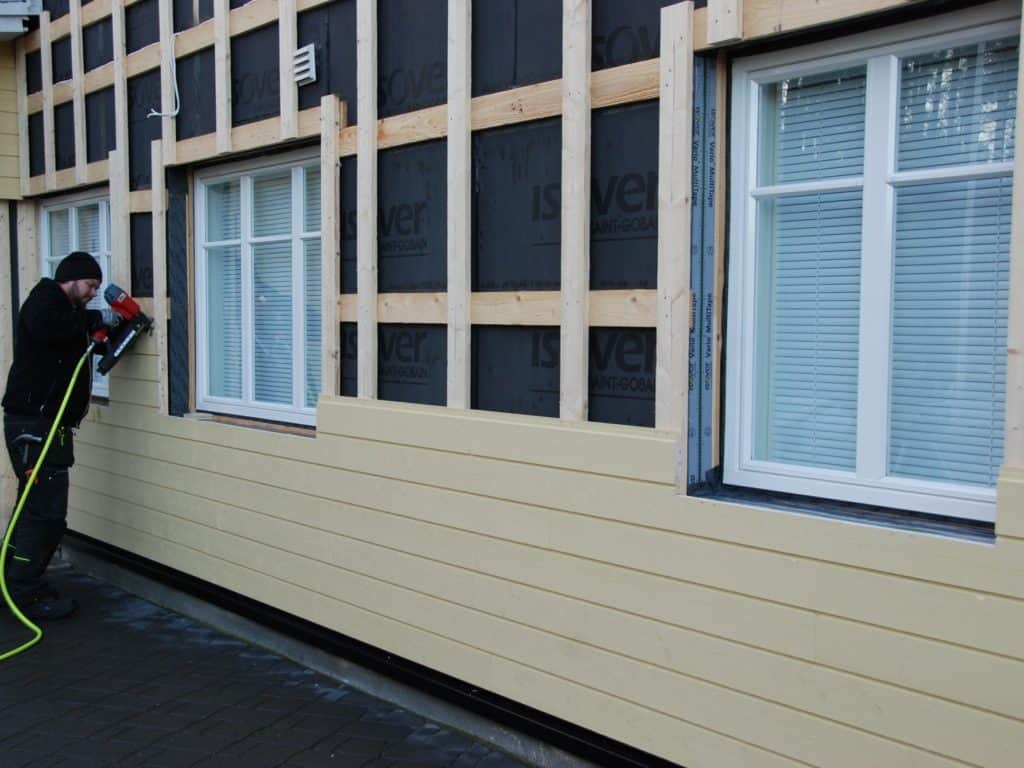
Especially in renovation projects, it is always a good idea to check the condition of the wall structure and insulation before installing exterior cladding panels. At this stage, it is also a good idea to install additional thermal insulation. A ventilation gap of at least 20 mm should always be left under the timber facade. This ensures that air can circulate behind the timber cladding and that moisture cannot condense behind the cladding panels. If the cladding panels are installed horizontally, the whole house can be vertically insulated. However, in this case, the client wanted to change the direction of the panelling and decided to cross-panel the whole house, which allows both vertical and horizontal panelling. The bottom paneling was done with K600 vertical and the top paneling with K600 horizontal. The scaffolding board can be 22-32 mm x 100 mm.
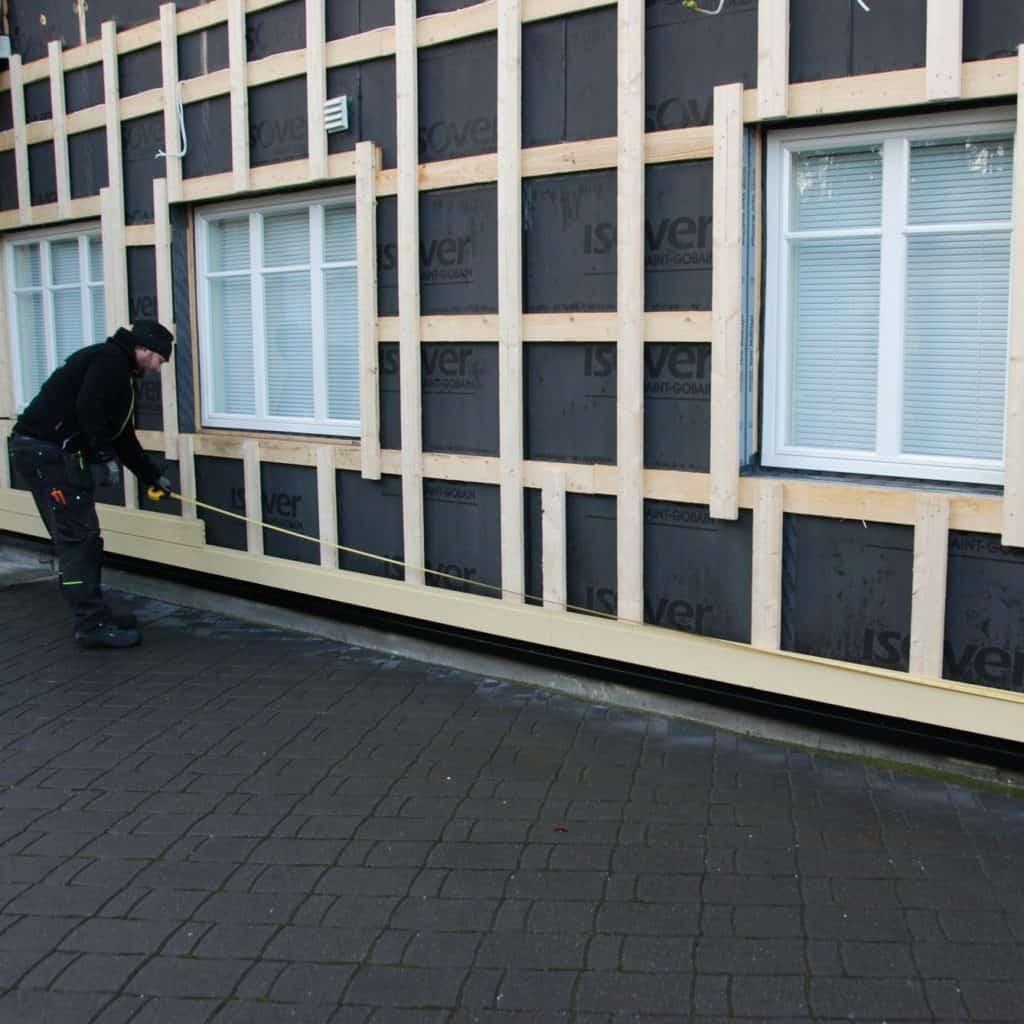
Remember to install the cladding panels at least 30 cm above the ground, so that moisture cannot migrate from the ground to the cladding boards. In renovation projects this is sometimes not possible. In such cases, the junction between the plinth and the façade can be clad. Remember to ensure that there is sufficient ventilation behind the façade. The starting height of the panelling is always determined by the lowest point of the plinth. This can be measured with a capping machine. The starting height is then marked on each wall, so that all starts are at the same height and there are no differences in level at the corners of the panel lines.
The shape, width and orientation of the panel affect the appearance of the façade
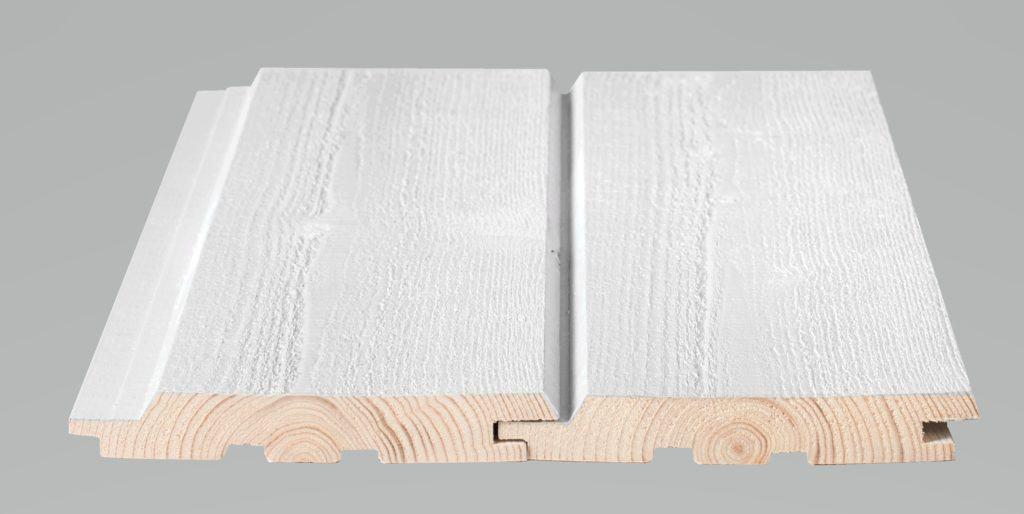
There are several profile options for exterior cladding panels. When choosing the right panel shape for your façade, you should consider whether you want to install the panels horizontally, vertically or both. Of the panel profiles, only Topcoat-V and Topcoat-U are suitable for vertical and horizontal installation. The width of the cladding panels can affect the appearance of the house. The most common widths range from 120 mm to 170 mm, although wider widths are available up to 280 mm. Wide panels are made from glued blanks and have a brushed surface, rather than the traditional fine-sawn finish. Exterior cladding panels are usually 20, 23 or 28 mm thick. For this project, the Topcoat-V profile was chosen in 23 mm thickness and 145 m width, as the same panel could be used for both the horizontal cladding and the vertical cladding of the upper parts.
The thickness and width of the panel affect the price. When comparing prices, it is worth comparing the price per square metre, not just the price per metre, as a wider panel costs less per square metre than a narrower panel. For example, a Topcoat-V profile panel will cost 10 metres per square metre, a 145 mm panel 8 metres and a 170 mm panel 6.66 metres. It is also worth remembering that the useful width of the panels is always less than the bulk width. For example, the useful width of a 120 mm panel is 100 mm.
Fully pre-painted exterior cladding panel
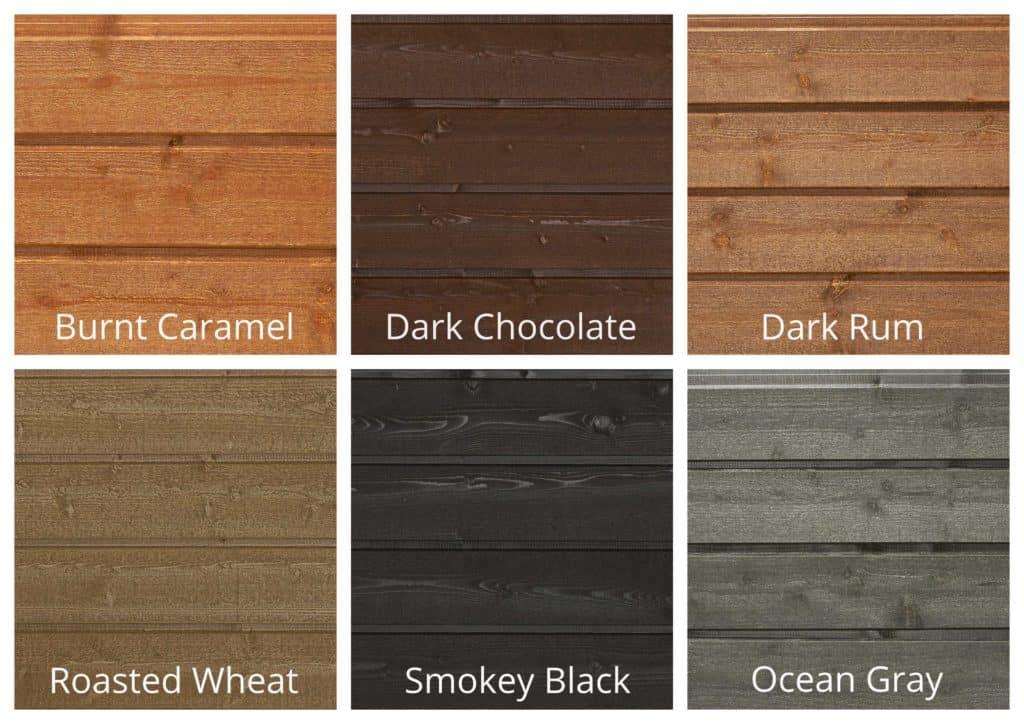
For this project, the façade panel was wanted to be prefinished to save time on the overall renovation. Fully pre-painted, the panels are available in opaque shades or in a durable finish. In opaque colours you can choose the right shade from the colour chart for exterior paintwork, while in durable colours you can choose from 6 different shades. The durable finish leaves the surface of the panel beautifully exposed and is highly resistant to the sun's UV rays. Pre-painted panels are also treated on the reverse side to prevent mould staining.
Panels hidden from view with hooks attached
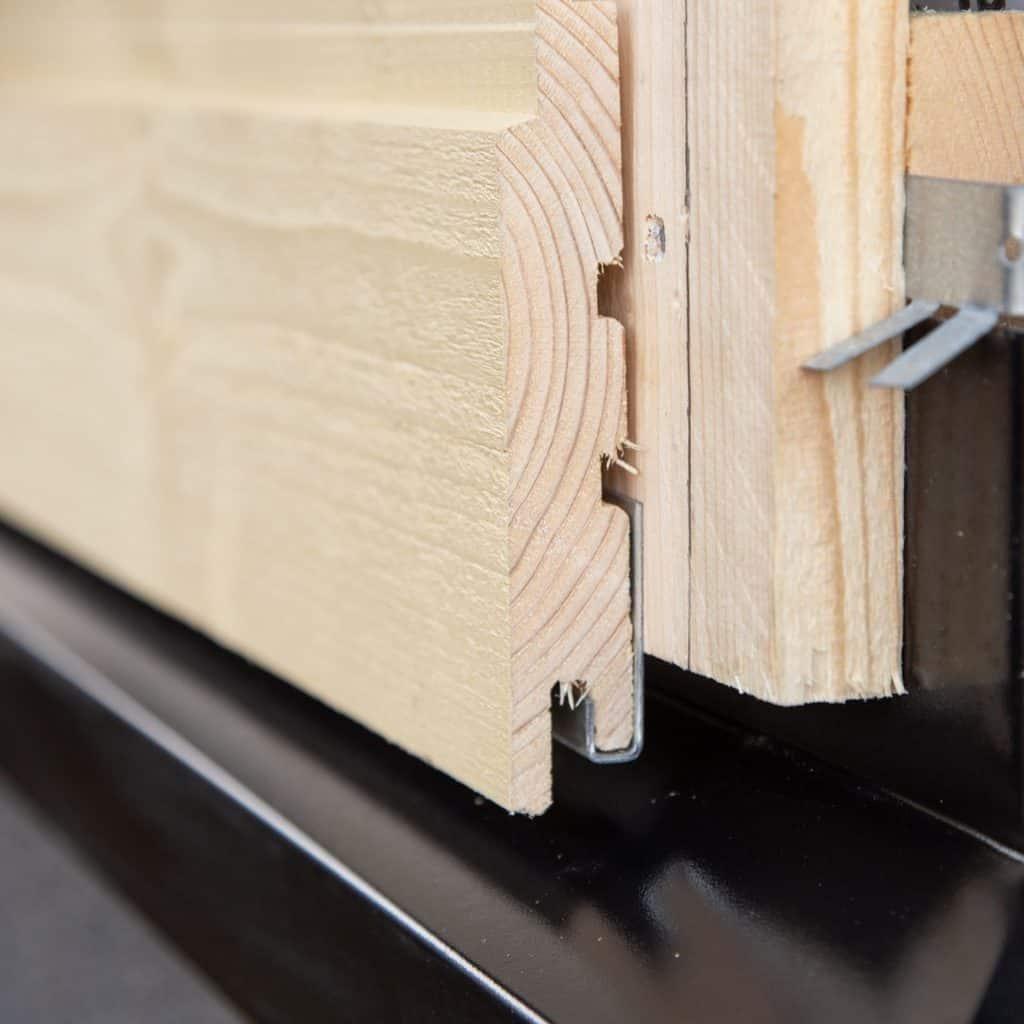
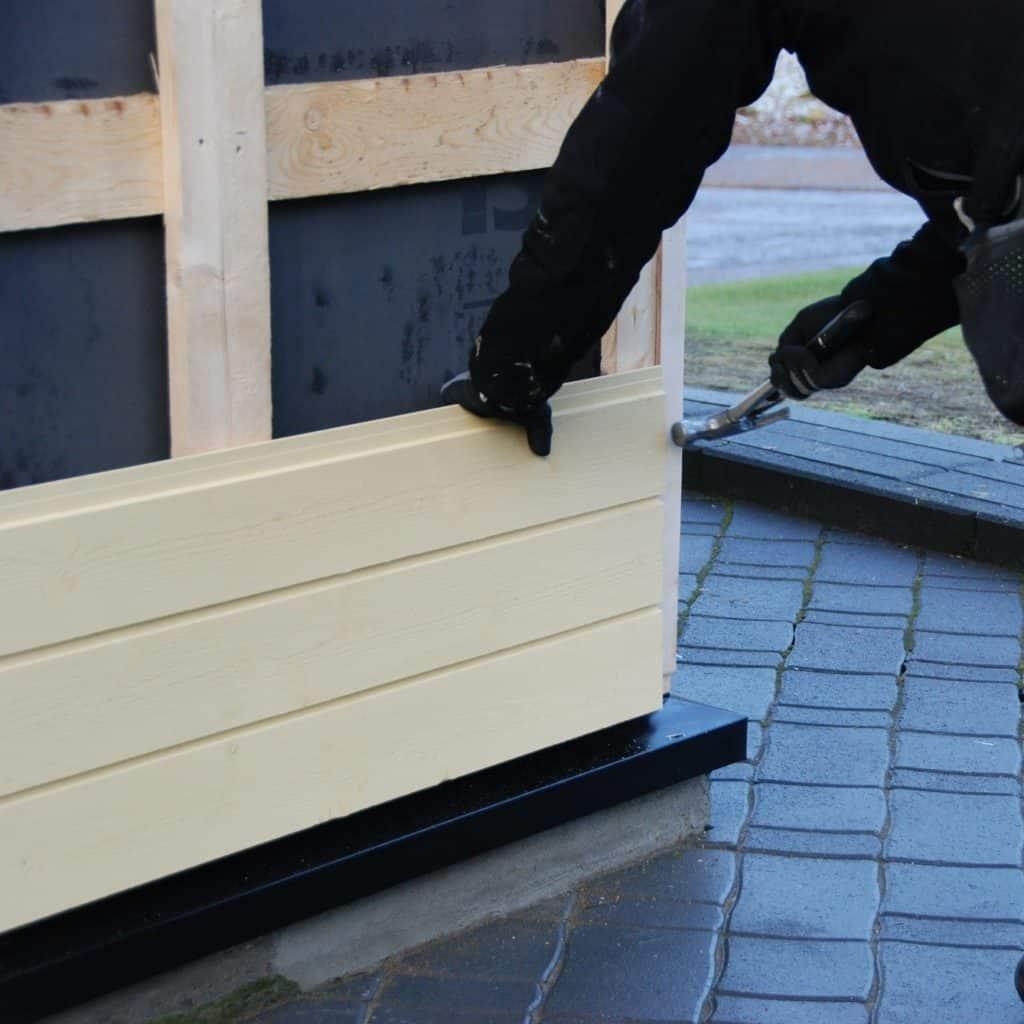
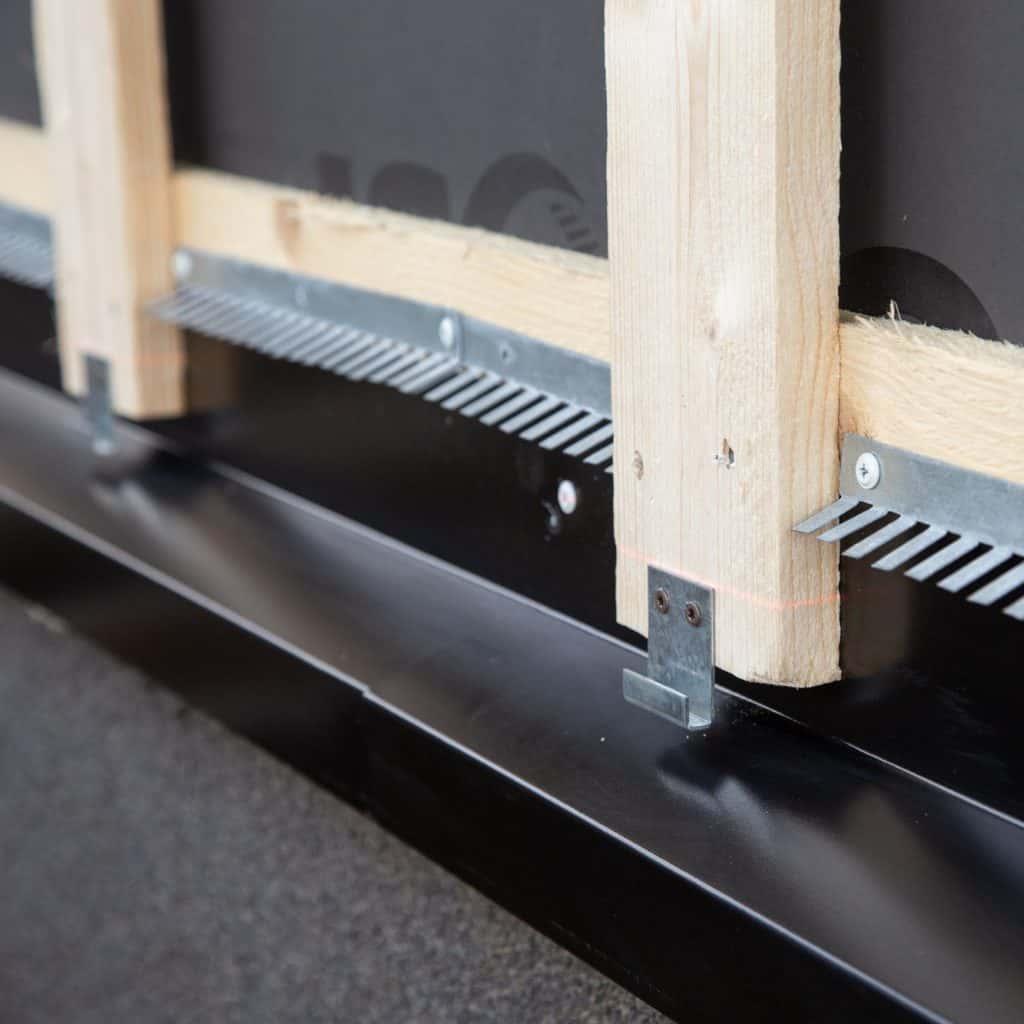
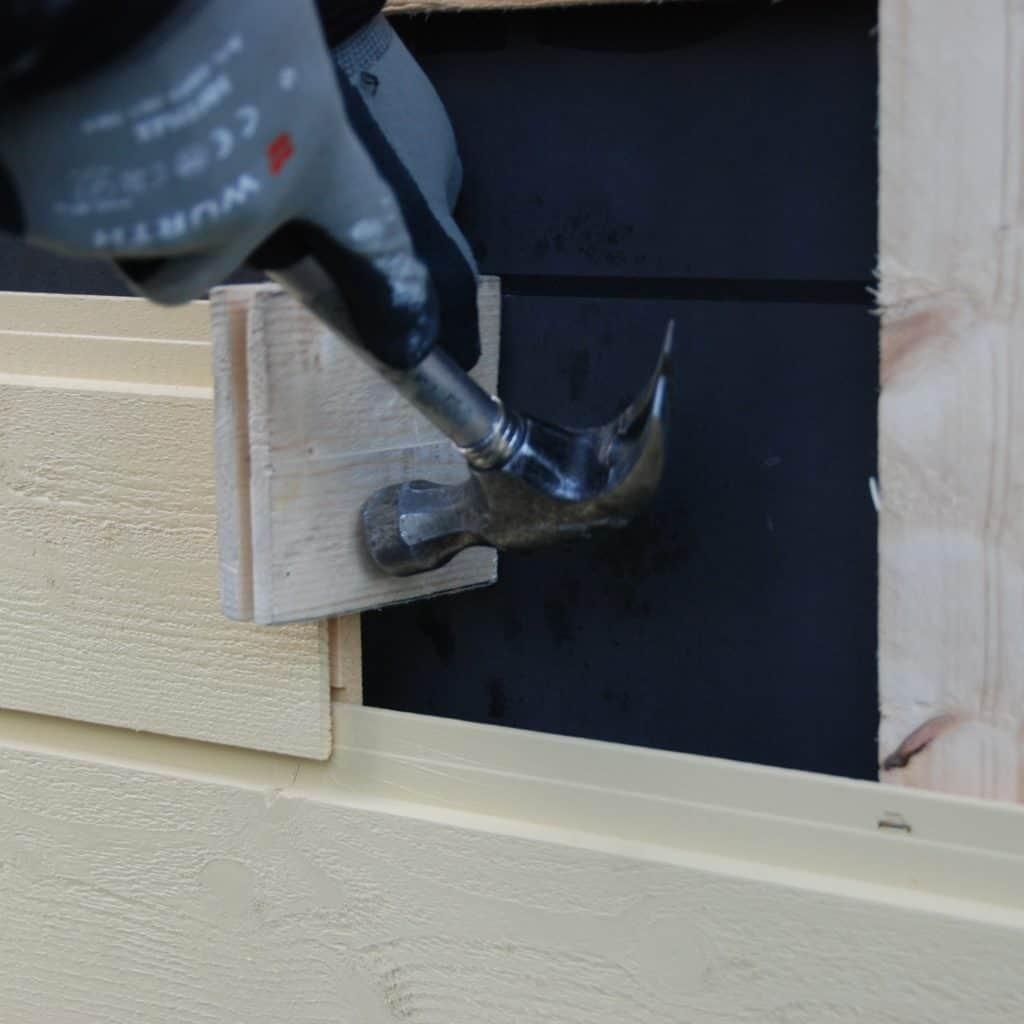
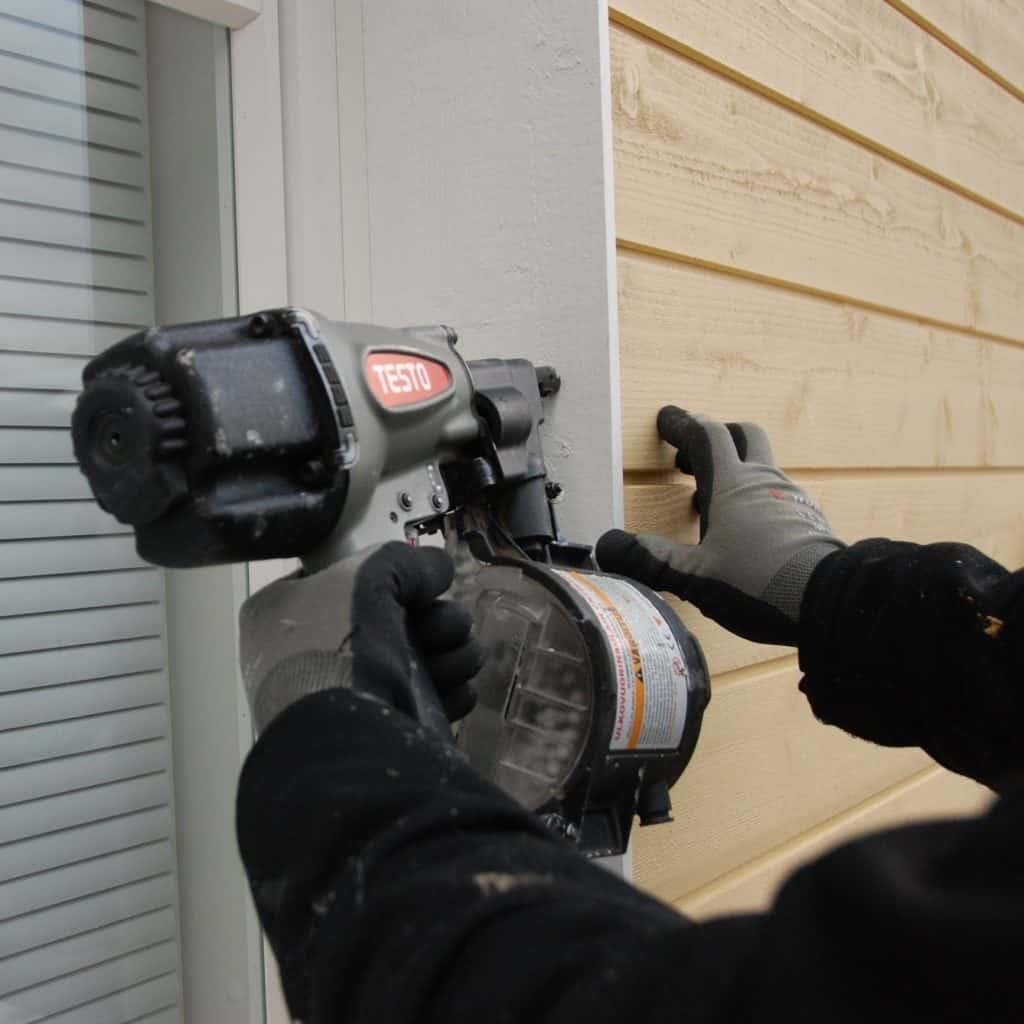
The Topcoat® panels are fixed from the hidden side with hooks and the bottom of the starter panel is fitted with its own RST starting hooks. Care should always be taken when installing the starter panel to ensure that it is perfectly straight. For small animals, it is advisable to protect the whole house with either small animal netting or mouse lists.
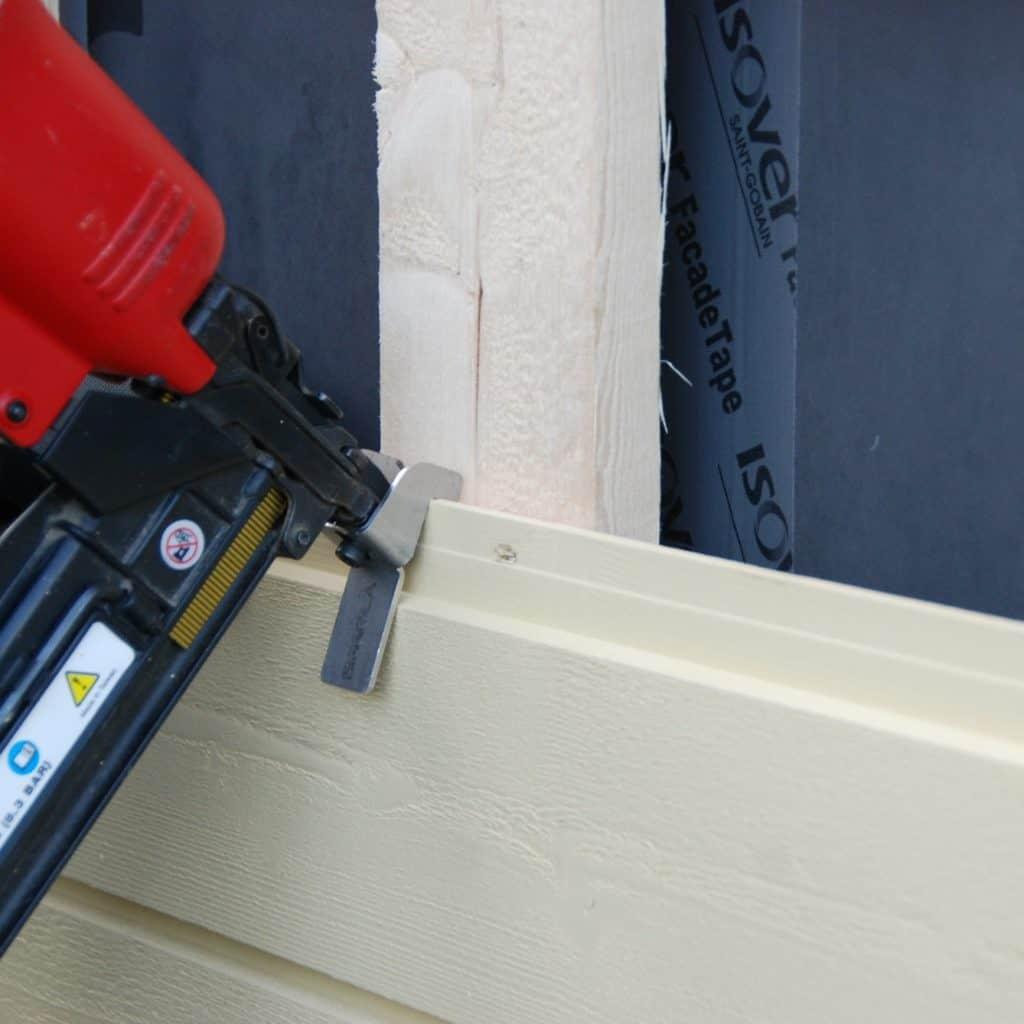
In this project, 50 mm rst hooks were used to fix the panels. Their advantage is that they do not split the panel during installation, as nailing might do. The tensile strength of the hooks is the same as when using nails. The hook nail is available with its own aiming tip, which is shaped to make it easier to shoot the hook at the right point and at the right angle.
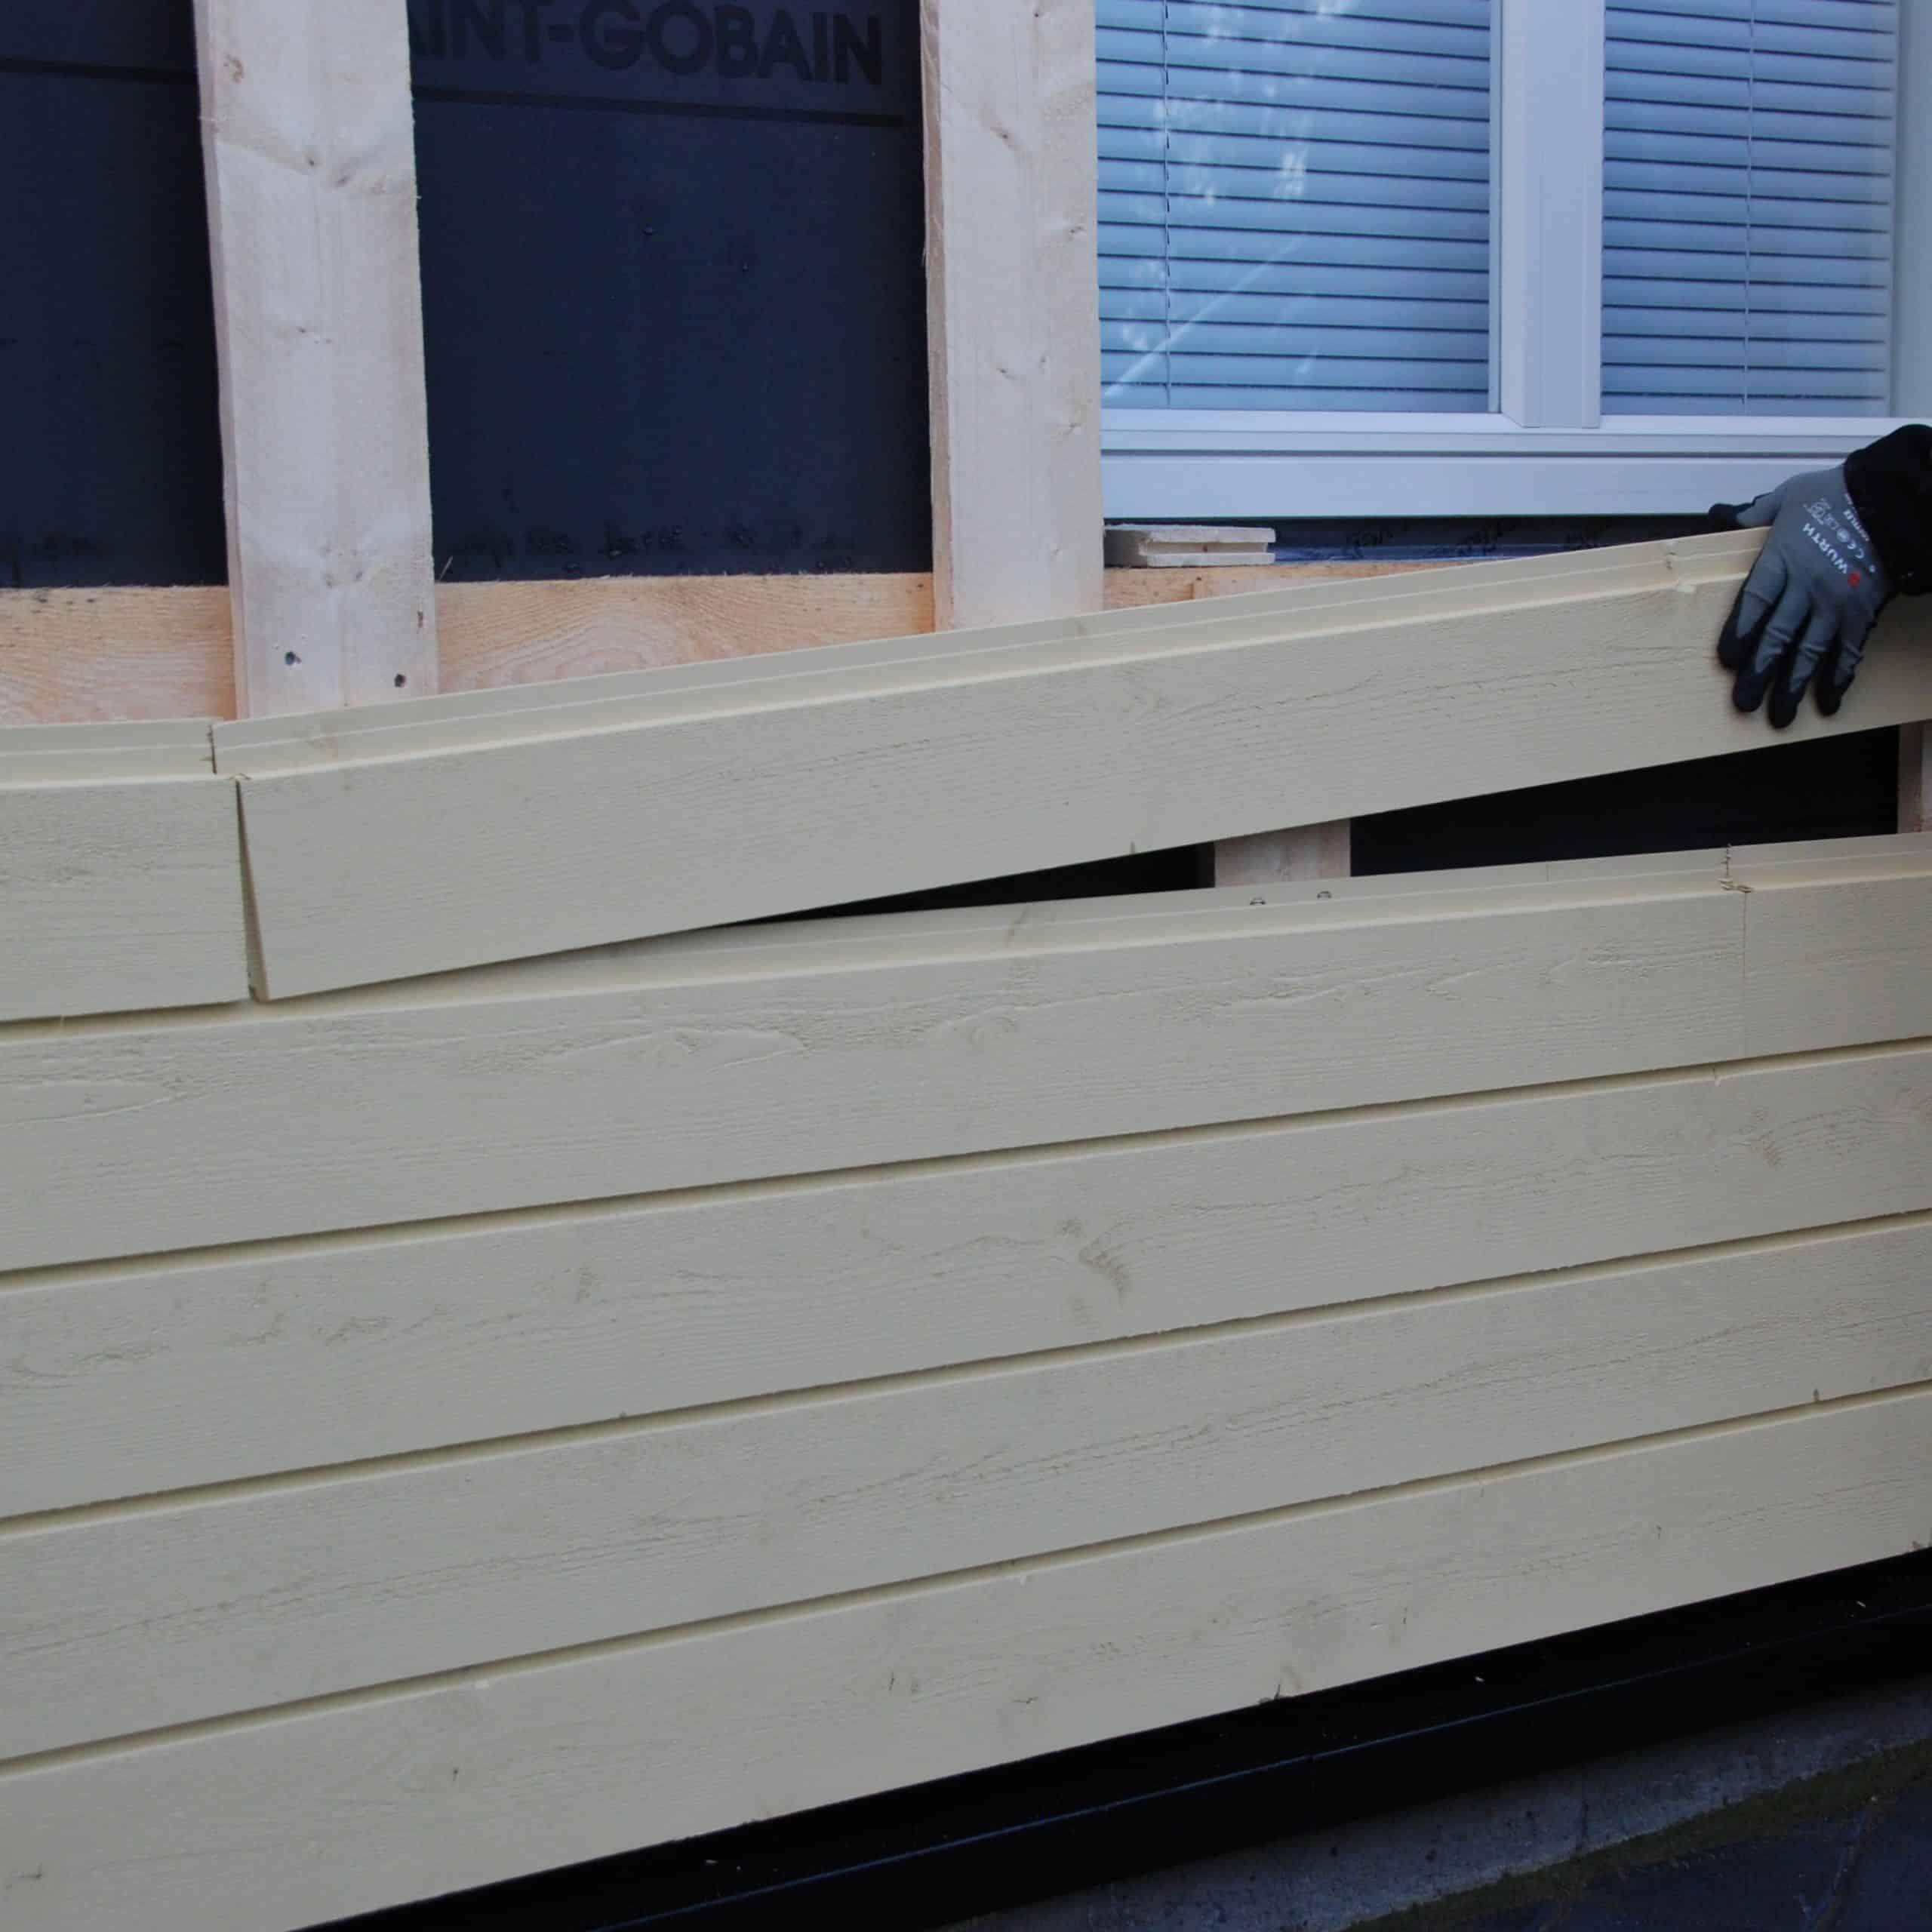
End-jointed panels reduce material waste
There is little wastage in a dotted panel, because you can start the next row with the piece that is left over from the previous row. However, it is not advisable to start with a very short piece of the panel. When stacking the paneling, care must be taken that the panel extension points do not coincide with the same spacing of the grid on adjacent rows of panels. The pre-painted end points make the extensions almost imperceptible.
If for any reason you have to cut the panel, the cut-off surface should be treated with paint before it is installed. The paint protects the panel from moisture and thus prevents the panel from cracking. Concealed fixing improves the weather resistance of the façade by preventing water and contaminants from damaging the wood at the fixing points. The end result is a neat and tidy appearance.
Be careful when storing
Exterior cladding panels should be stored on a flat surface to prevent them from warping. It is advisable to place proper and sufficiently high support trees under the board packages. This prevents moisture rising from the ground from damaging the panels. Even if the packages are covered with plastic, it is advisable to apply a protective sheet of tarpaulin over them to protect them from the rain.
Pre-painted vs. primed
Of course, a pre-painted panel costs more than a traditional primed panel, but when you add in the time saved and the fact that the installation can be done in late autumn or even in winter, the difference is not that much. Next summer, you won't have to rent and erect scaffolding again and wait for the right weather and painters to do the painting. It will be enough to do any maintenance work after 10-15 years.
Ladonna's change of direction in the distribution list
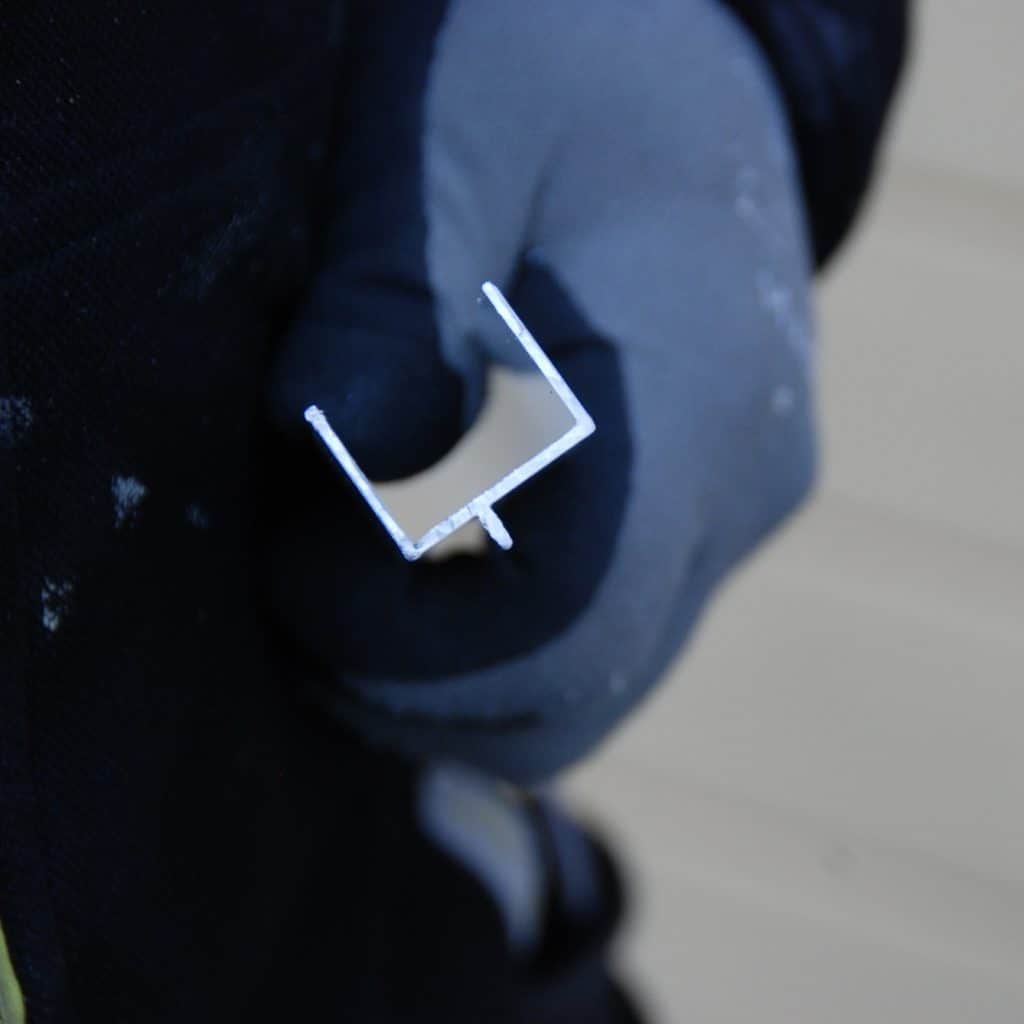
Quite often in new buildings, the panelling is done entirely horizontally. In older buildings or in houses where a vertical loading is desired to add to the appearance of the façade, the change of direction of the loading can be conveniently done with a partition bar. The partition is pre-painted and available in two sizes; 38×95 mm and 38×145 mm. It can be used to divide horizontal and vertical cladding or to delineate or highlight the exterior cladding seams or different colour tones.
In this application, the manifold is used in end nodes where it is desired to change the installation direction to vertical. The distribution list is also fixed with hooks. A female point of appropriate size is driven into the bottom edge of the end panels of the vertical panels, for example with a cricket, to fit into the male point of the partition. The cut end is protected with paint before it is put in place. The top ends of the vertical panels may not need to be sawn as the top end will be hidden behind the eave boards. For roof trusses, make the notch just the size needed and no larger. A notch that is too large may show up as a nasty hole under the eave boarding.
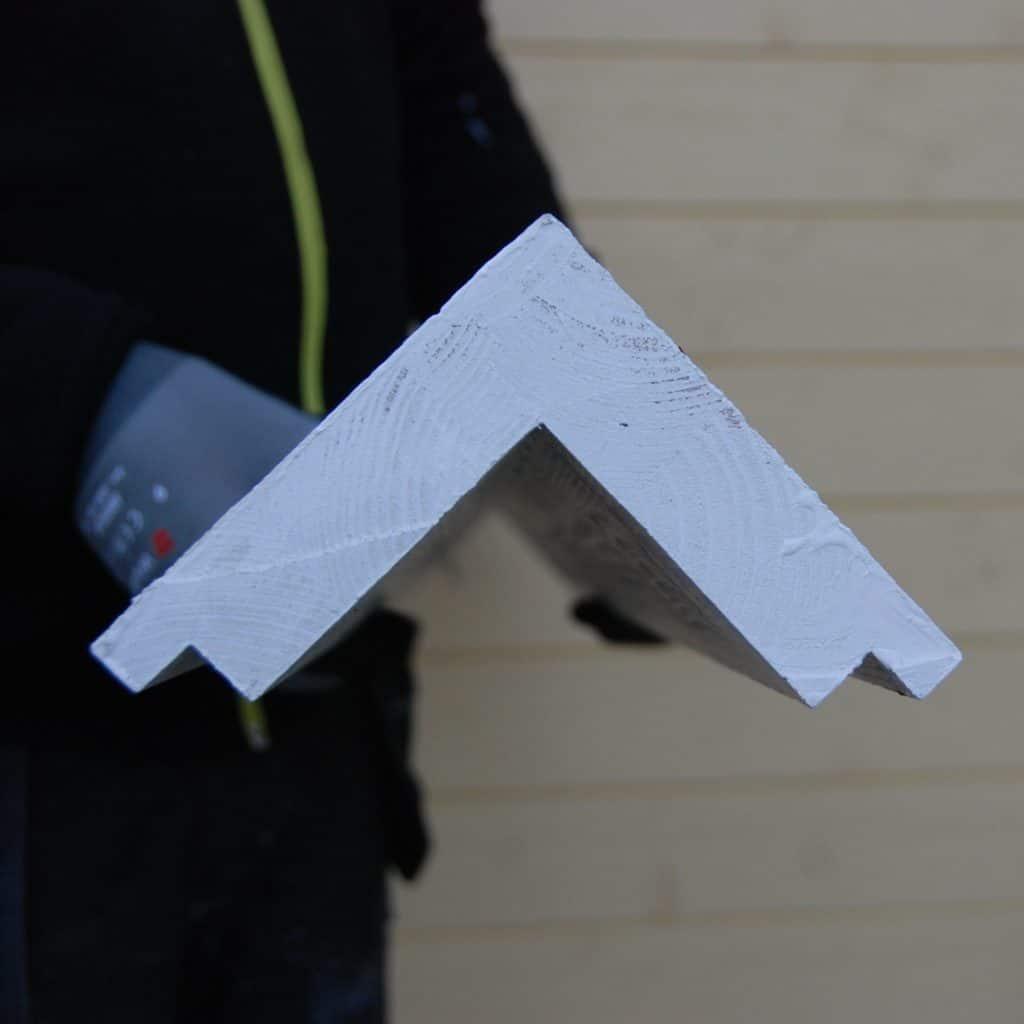
Straight projecting corners with a prefabricated corner element
In general, the projecting corners are made with two 100 or 120 mm wide covering boards. A new, finished corner element makes it easier and quicker to finish the building. Two sizes of finished corner are available; 93×93 mm and 133×133 mm, both 3660 mm long. The corners are pre-glued to shape, primed and top-coated once.
The corners are cut to the desired length on site. The top end of the corner is cut diagonally in line with the slope of the eaves so that there is no gap between the corner and the eaves.
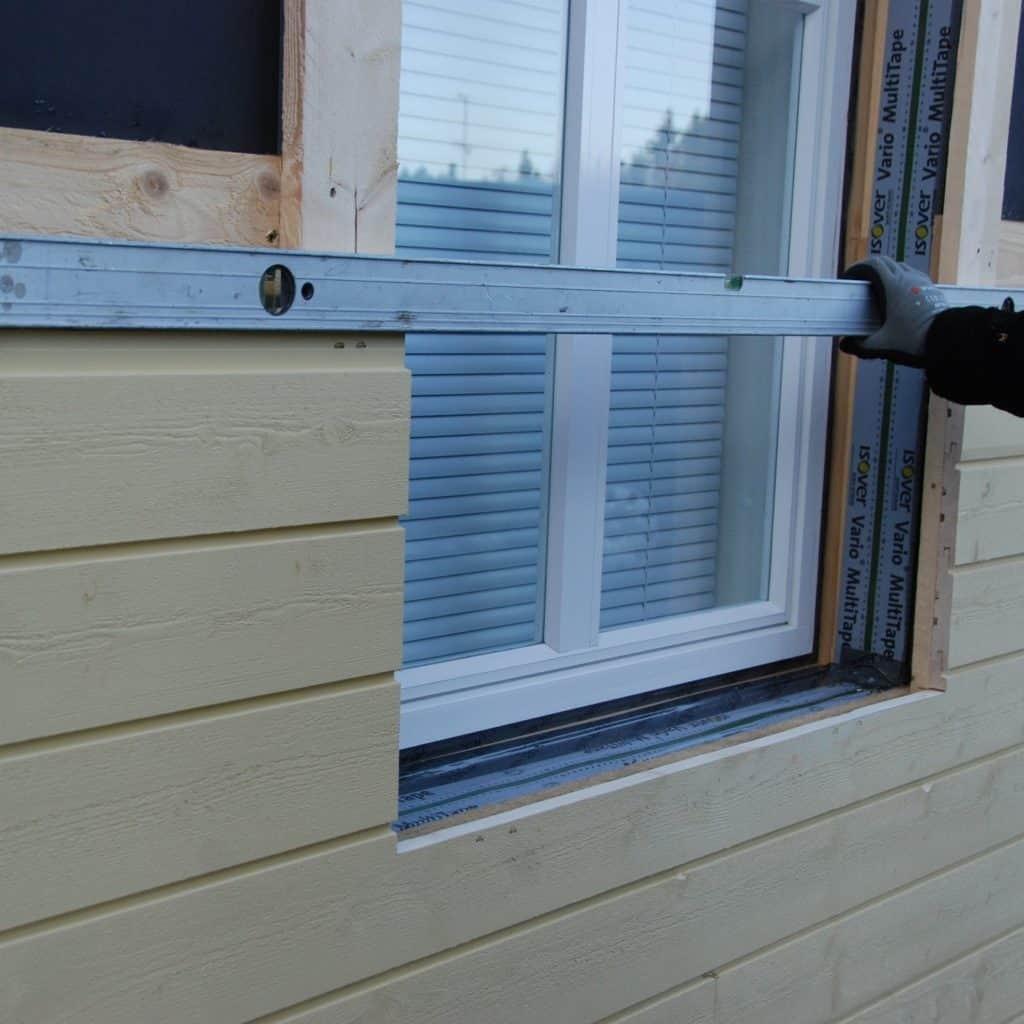
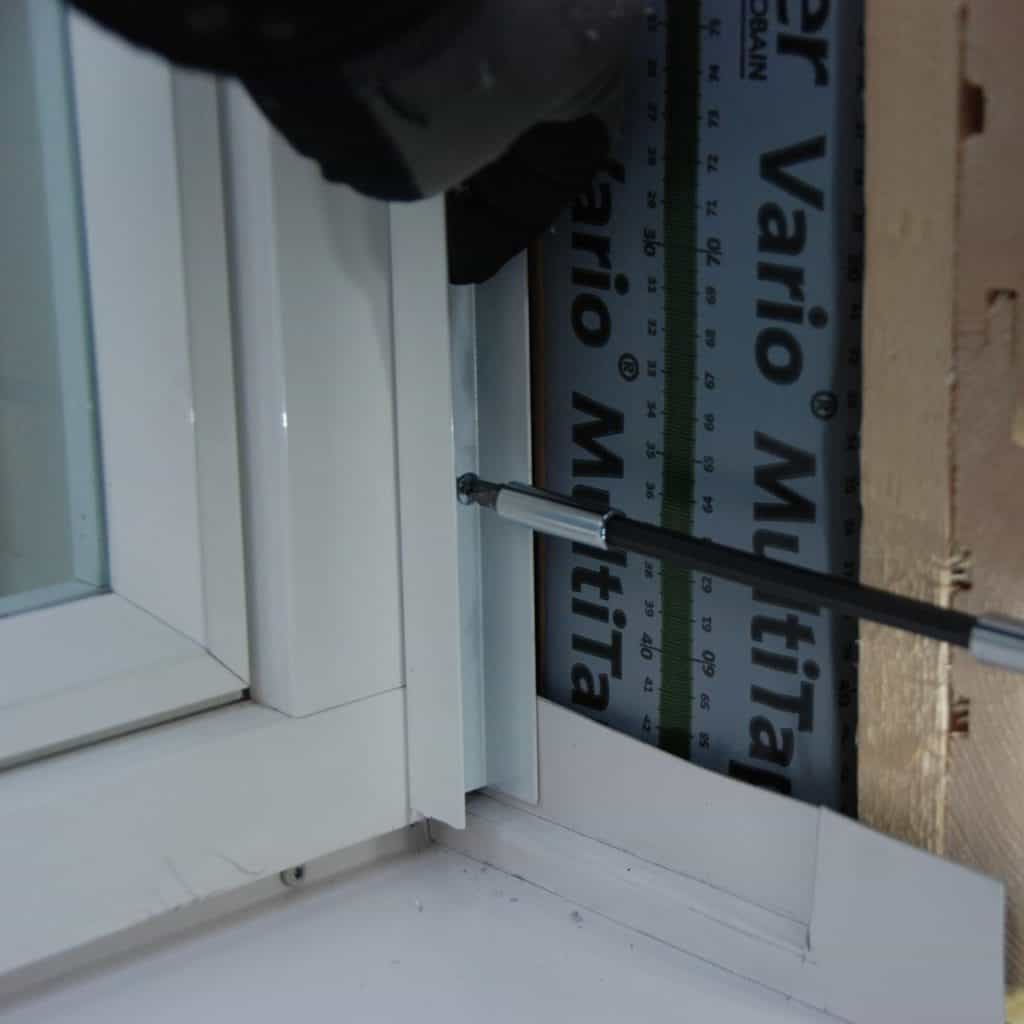
Cool window treatments with aluminium sills
Pre-painted window mullions are used to finish window reveals and create neat straight lines and tight seams. The basic colour of the window sills is white, but they can also be tinted to the desired colour.
The primed and painted window sills are 23 mm thick and 176 mm wide. The window dressings are applied before the installation of the smyth boards. The drip edge of the window cladding should be dimensioned approximately 1-2 cm outwards from the facade surface. If a cover board is also planned under the window, this should be taken into account in the sizing.
Read Tekniikan Rakennusmaail's article on Topcoat® panels
Watch the video below to see how to install TOPCOAT® Exterior cladding panels